By the team who’ve seen every crumbling façade, sketchy DIY patch job, and “she’ll be right” disaster across the Greater Sydney basin.
Let’s be honest. Most Sydney homeowners don’t think about their walls until something goes seriously wrong — a crack that’s been quietly growing for three years, water bubbling behind the laundry tiles, or that section of the front fence that looks like it survived a minor earthquake. Sound familiar?
Here’s the thing: your walls work hard. Sydney’s humidity, UV punishment, salt air in the eastern suburbs, and the endless freeze-thaw cycles in the hills district all take their toll. And when walls start showing their age, a fresh coat of paint isn’t going to cut it. What you actually need is professional rendering — done right, by people who know the difference between a hairline crack and a structural cry for help.
This guide covers everything: what rendering actually is, why timber and wood substrates need specialist attention, which render type suits your property, what the process looks like from start to finish, and how to pick a rendering contractor in Sydney who won’t disappear after the deposit clears.
What Is Wall Rendering — And Why Do Sydney Walls Need It More Than Most?
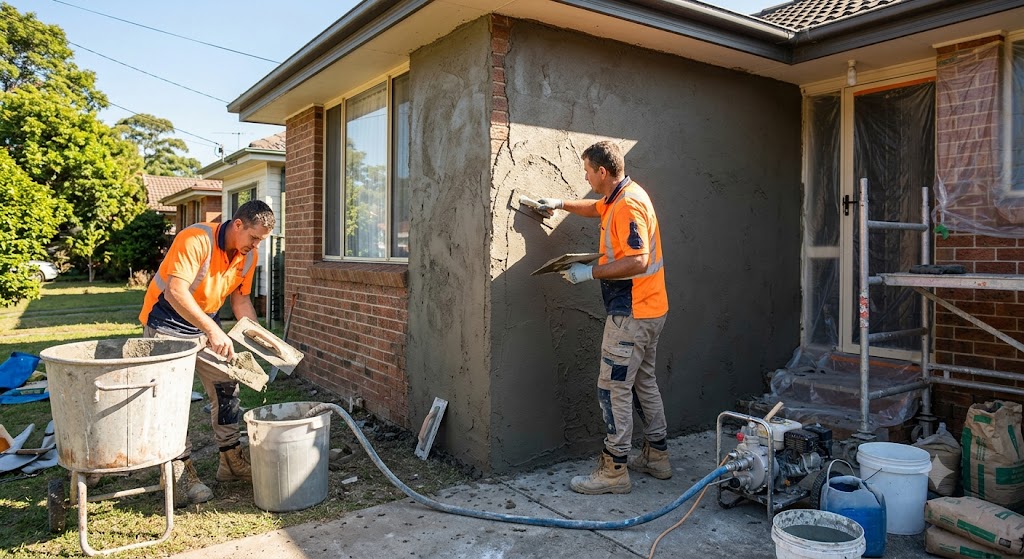
Wall rendering is the process of applying a protective and decorative coating — cement, acrylic, or polymer-based — over masonry, brick, concrete block, or prepared timber substrates. The result? A smooth, textured, or pigmented surface that dramatically improves your property’s appearance, weather resistance, and structural integrity.
But Sydney is not just “any” city for building materials. We sit in a coastal subtropical zone. That means:
- High sustained humidity that traps moisture behind poorly vapour-permeable coatings
- Some of Australia’s highest UV intensity, particularly on north and west-facing façades
- Salt-laden air in coastal suburbs that accelerates material degradation
- Wide temperature swings in western and hillside suburbs that cause expansion and contraction
Paint can’t handle all of that. Neither can old, delaminating render that’s been on since the ’80s. Modern cement rendering services in Sydney and flexible acrylic systems are specifically engineered for these conditions — and if you’re not using the right system on the right substrate, you’re just postponing the problem.
Can You Render Over Wood and Timber? Yes — But Don’t Even Think About DIYing It
Here’s a question that comes up constantly, especially in Sydney’s older weatherboard suburbs: “Can I render over timber or wood frames?”
Short answer: yes. Longer answer: timber moves. It swells in our humid summers, contracts in winter, and it will absolutely expose any render that isn’t applied over the correct substrate preparation system.
Here’s the professional process for rendering timber and wood-framed walls:
Step 1 — Surface Assessment and Timber Conditioning Before anything goes on, the timber needs to be dry, structurally sound, and free from rot, mould, or previous coating failure. Any compromised boards get replaced at this stage — not patched over.
Step 2 — Waterproof Membrane Installation A breathable waterproof sarking or membrane layer goes on first, creating a moisture management layer. Skip this and you’ll get blistering render within 12–18 months.
Step 3 — Galvanised Render Mesh or Carrier Board Because you can’t apply render directly to timber (no bond, no stability), a render carrier — either metal lath mesh or fibre cement sheeting — gets fixed over the membrane. This creates the rigid, render-compatible substrate.
Step 4 — Flexible Render Application in Thin Coats Standard cement render is too brittle for wood-frame structures. The correct product here is either a polymer-modified cement render or, more commonly, acrylic render — which has the elasticity to move with the building without cracking.
Step 5 — Ventilation Details Moisture management doesn’t stop at the membrane. Weep holes, flashing, and cavity ventilation details are all part of a professionally executed timber rendering job. Get this wrong and you’ll have silent moisture damage behind a perfectly attractive-looking façade.
This is not DIY territory. Not in Sydney, not on a weekend, not with a YouTube tutorial and a bucket of render from Bunnings.
The Rendering Options Actually Worth Knowing About
Not all render is created equal. Here’s how the main types stack up — and when each one makes sense for Sydney properties.
Cement Rendering
The workhorse of the industry. A sand-and-cement mix applied over brick, block, or concrete in one to three coats, delivering a hard, durable finish. Cement rendering in Sydney is the go-to for solid masonry homes, new construction, retaining walls, and fences.
Best for: Brick veneer homes, concrete block construction, garden walls, older homes with solid masonry Not ideal for: Timber frames (too brittle), very old heritage homes with weak mortar joints Finish options: Smooth, sand-finish, roughcast, or bagged
Acrylic Rendering
Acrylic is the modern upgrade. It’s a factory-made polymer compound that delivers a consistent, flexible, mould-resistant finish. It adheres to a wider range of substrates, dries faster than cement render, and comes in a huge range of textures and colours straight out of the tub.
Acrylic render services in Sydney are increasingly the preferred choice for renovations and feature walls because of the finish quality and the lower shrinkage cracking risk. It also handles Sydney’s UV exposure significantly better than painted cement render — especially on northern and western elevations.
Best for: Renovation work over existing surfaces, timber substrate systems, decorative interior feature walls, coastal properties Bonus: When layered over a cement base coat, you get the durability of cement with the finish quality of acrylic — best of both worlds
Polystyrene Cladding Rendering (EPS Systems)
This one’s growing fast — and for good reason. Polystyrene cladding rendering (also called EPS or expanded polystyrene rendering) involves fixing insulated polystyrene panels to the external wall and then applying a reinforced polymer render coat over the top.
Polystyrene cladding rendering in Sydney delivers real thermal performance benefits — cutting heating and cooling costs — while also completely transforming the external appearance of a property. It’s popular for both new builds and renovation retrofits, particularly on homes where the existing façade is beyond repair or cosmetically outdated.
Best for: Thermal performance upgrades, heritage façade transformations, feature walls, commercial façades Real benefit: Up to 40% reduction in wall-related heat loss — which in Sydney’s west means a noticeably cooler house in summer
Bathroom Wall Rendering
Interior rendering gets overlooked, but nowhere matters more than the bathroom. Tiles over poorly prepared or compromised walls will eventually fail — grout cracks, water gets in, and you’re looking at a full demolition-and-redo situation. Proper bathroom wall rendering in Sydney involves applying a waterproof cement render base — sometimes called a “bed coat” — over the substrate before tiling.
This creates a flat, level, moisture-resistant surface that dramatically extends the life of your tile installation. And if your existing bathroom walls are already showing movement, hollowness, or tile delamination, don’t re-tile over the problem. Fix the render beneath first.
Signs Your Sydney Walls Are Screaming for Attention
Your walls are more communicative than you think. Here are the red flags that mean it’s time to stop scrolling and start calling:
- Horizontal or diagonal cracks across rendered surfaces (these aren’t cosmetic — they indicate movement)
- Hollow sections when you tap the wall (delaminated render traps moisture and will eventually fall away)
- Efflorescence — those white salt deposits blooming through the surface
- Blistering or bubbling under your paint or render coat (moisture is in there)
- Discolouration, staining, or recurring mould that keeps coming back despite cleaning
- Crumbling or loose render at corners, window reveals, or base of walls
None of these get better on their own. And the longer you leave them, the more expensive the fix becomes. That’s exactly why wall render repair in Sydney is one of the most requested services — because Sydneysiders are very good at putting things off until the problem becomes unavoidable.
The Professional Rendering Process: What to Actually Expect
Good rendering is a process, not a product. Here’s what a proper job looks like from first contact to final walkthrough.
Stage 1 — Inspection and Assessment A proper renderer doesn’t just hand you a quote over the phone. They inspect the substrate, identify moisture issues, check for structural movement, and assess existing coating condition before recommending a system. If they quote without inspecting, walk away.
Stage 2 — Surface Preparation This is where most of the skill lives. Old delaminating render gets removed. Cracks are chased out, cleaned, and filled with appropriate repair compounds. Mould is treated. Surfaces are cleaned down. This can take as long as the application itself on older properties — and it’s the difference between a render job that lasts 20 years and one that fails in three.
Stage 3 — Priming The right primer bonds the render to the substrate and controls suction. Different substrates — masonry, concrete, polystyrene, fibre cement — all need different primers. This step is often skipped on cheap jobs. Don’t let it be skipped on yours.
Stage 4 — Render Application Depending on the system, this is one to three coats applied in sequence, with appropriate drying time between each. The base coat establishes thickness and flatness; the finish coat delivers the final texture, colour, and surface quality.
Stage 5 — Detailing and Finishing Corners, reveals, control joints, penetrations, and transitions all get proper finishing attention. This is where experience really shows — a well-detailed render job looks sharp, sheds water correctly, and resists cracking at transition points.
Stage 6 — Cleanup and Walkthrough A professional crew cleans the site and walks through the completed work with you before closing out. You should be able to see what you paid for, ask questions, and have any concerns addressed before they pack up.
Want to see what finished jobs actually look like? The RDY Group portfolio gives you a real-world sense of finish quality and scope across residential projects.
The Benefits of Getting It Professionally Done (Versus Hoping for the Best)
If you’re still on the fence about whether professional rendering is worth the investment, consider this:
Property Value Uplift: Kerb appeal directly influences sale price. A well-rendered home with a clean, modern façade consistently outperforms comparable properties with tired or damaged exteriors at auction.
Weather and Moisture Protection: Properly applied render — especially when top-coated — creates a continuous weatherproof barrier across your walls. No more water ingress through cracked mortar joints or aged brick.
Energy Efficiency: Polystyrene rendering systems add meaningful insulation to the building envelope. In a Sydney summer with power prices where they are, that’s a real ongoing saving.
Structural Protection: Render slows down carbonation of concrete, protects soft brick from salt and moisture attack, and bridges minor movement cracks before they become major ones.
Less Maintenance: A quality acrylic or polymer render system needs far less ongoing attention than painted masonry. No repainting every few years. No touching up crumbling mortar.
It Looks Incredible: Let’s not be shy about this. A freshly rendered home looks genuinely spectacular. It’s one of the highest-impact visual upgrades available to any Sydney property.
Why RDY Group Rendering — Not Just “A Renderer”
Sydney has no shortage of rendering contractors. It also has no shortage of stories about rendering contractors who disappear mid-job, apply the wrong product to the wrong substrate, or deliver a finish that cracks within the first wet season.
RDY Group Rendering has been operating across the Sydney metropolitan area for over 15 years. That’s not a marketing number — that’s 15 years of navigating Sydney’s specific building stock, weather patterns, substrate challenges, and homeowner expectations. The team is Australian owned and operated, fully licensed and insured, and has built a project history that spans everything from single-room bathroom wall rendering in Parramatta to full polystyrene EPS cladding systems in the Hills District.
What separates experienced rendering contractors from the rest isn’t just the quality of their application — it’s the quality of their surface preparation, their system knowledge, and their ability to identify what a wall actually needs rather than just what looks like the quickest job.
Browse the full range of rendering services or head to the contact page to book a free inspection and quote. No obligation, no pressure, no surprises on the day.
The Bottom Line
Rendering isn’t glamorous. It doesn’t have a TikTok hashtag. Nobody’s filming reels of primer coats and render mesh installation. But for Sydney homeowners who want walls that look good, hold up to the climate, and actually protect the investment they’ve made in their property — it’s one of the most practical and high-return decisions you can make.
Whether you’re dealing with a cracked front wall on a 1970s brick veneer, a timber weatherboard home that needs a complete substrate and render system, crumbling bathroom tiles on a failed render base, or an EPS cladding upgrade to drag your home into the current decade — the team at RDY Group can assess, plan, and execute it properly.
Don’t wait for a wall crack to become a water problem. Don’t let a render repair turn into a full façade replacement. And definitely don’t let a bloke with a mixer on the back of a ute quote you $800 for a job that’ll cost $8,000 to undo in three years.
Get it done right the first time. Your walls — and your wallet — will thank you.


